
GIT Installation on Windows | GitHUB Vs GitLAB | How to clone and push Local repo to Public repo | Useful GIT Commands

 Git is a version control system that lets you manage and keep track of your source code history. 

GitHub is a cloud-based hosting service that lets you manage Git repositories

GitLab is an open source code repository and collaborative software development platform for large DevOps and DevSecOps projects

Note: 

Since both GitHub and GitLab are version control systems (VCS), it can be difficult to choose one of the two. The most significant difference between the two is that while GitHub is a collaboration platform that helps review and manage codes remotely, GitLab is majorly focused on DevOps and CI/CD.

How to download GIT client on windows and configure it

For Download Use below link :

https://git-scm.com/download/win

Once downloaded, follow the the setup wizard for installation


Once Installation is done, Open the GIT as below:


Initial thing to do before use: Configuation

Write the following command to aware the GIT who you are:
Your Name and Email as below in inverted commas

git config --global user.name "ibraraziz"
git config --global user.email "ee.ibrarziz.com"


For Infromation: GIT client support many of the Linux commands as well so i am going to make a directory in C drive as follows and going to initialize it so that GIT can be friend with intialized folder (GIT init command will make this folder as local GIT Repo)

cd /c  (enter into drive c)
mkdir gitrepo (creates a folder with name gitrepo)
git init (initialize the folder as git repo folder)


Now for example you want to clone/copy a public repo from Github to your local/system
use the following command

cd gitrepo 
git clone https://github.com/vmware-tanzu/velero

as follows:


this will fetch the public repo to your local system.


HOW TO PUSH TO LOCAL REPO TO PUBLIC REPO


 You want to make some changes in you local repo and push it your public repo, it can be done using following commands 

Pre-req:

You need to have a account of github as of mine below:


create a remote repo there like below:


On GIT add that remote repo path

git  git remote add origin https://github.com/ibraraziz

Once remote repo origin added, you can push the local repo to that public repo as below

Goto the folder from which you want to push the file

cd localrepo( you want to push files placed in that local repo)
git add .  (the . at the end will add all file)
git commit -m " My first commit" ( in inverted commas any messaage )


git push --set-upstream https://github.com/ibraraziz/newfromlocal master

Once that command is entered it will ask for the password for the github as below a POP-UP will appear


Enter the username and password and you will get the following message upon success.
GIT client shows as below


local repo is push to public repo as you can see from github as well as below


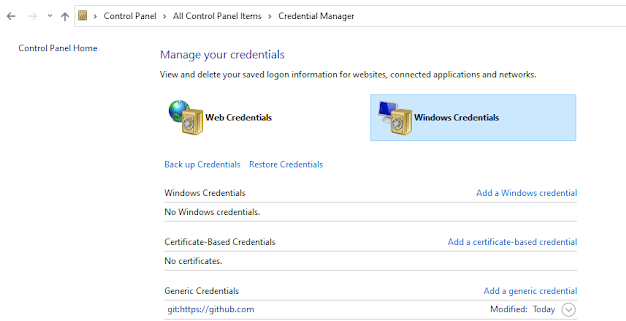
Informational Note: GIT stores the password on your computer on below path, this is  useful when you want enter the new password or mistakenly wrong password is entered and want a re-pop up for password 


For more details you can explore the GIT documentation as well https://git-scm.com/docs


Mostly used commands are as follows:

git config
Git init
git add
git commit
git pull
git push
git clone
git status
git log
git status
git remote
git merge
git branch
git checkout


Comments

Popular posts from this blog

Choosing the Right OpenShift Service: Service Mesh, Submariner, or Service Interconnect?

In today’s digital world, businesses rely more and more on interconnected applications and services to operate effectively. This means integrating software and data across different environments is essential. However, achieving smooth connectivity can be tough because different application designs and the mix of on-premises and cloud systems often lead to inconsistencies. These issues require careful management to ensure everything runs well, risks are managed effectively, teams have the right skills, and security measures are strong. This article looks at three Red Hat technologies—Red Hat OpenShift Service Mesh and Red Hat Service Interconnect, as well as Submariner—in simple terms. It aims to help you decide which solution is best for your needs. OPENSHIFT Feature Service Mesh (Istio) Service Interconnect Submariner Purpose Manages service-to-service communication within a single cluster. Enables ...

TKGS VMware/Kubernetes ReadWriteMany Functionality with NFS-CSI

 TKGS VMware WRX Functionality with NFS CSI ReadWriteMany Access mode in Kubernetes When it come to RWX access mode in PVC, TKGS support it if we have the following: 1. Kubernetes is upgraded to 1.22.9 (This version supports this RWX functionality) 2. vSAN should be there in your environment (VMware uses the vpshere csi, which only support vSAN) How to done it without vSAN: 1. Upgrade the kubernetes to version 1.22.9 2. Use NFS-CSI and then create a new storage class to be consumed. Work Around : 2.a : Please use the below link to get the nfs-csi-driver  https://github.com/ibraraziz/csi-driver-nfs Note: It absolutely fine that we have multiple CSI drivers/provisioner in kubernetes (Just for information) Step:1 Goto csi-driver-nfs/deploy/v4.0.0/ and apply that yaml into your environment. It will create NFS csi provisioner and controller pods in namespace of kubesystem as below Step: 2 Now create storage class and goto the example folder  csi-driver- nfs/deploy/example...

Managing AI Workloads in Kubernetes and OpenShift with Modern GPUs [H100/H200 Nvidia]

 AI workloads demand significant computational resources, especially for training large models or performing real-time inference. Modern GPUs like NVIDIA's H100 and H200 are designed to handle these demands effectively, but maximizing their utilization requires careful management. This article explores strategies for managing AI workloads in Kubernetes and OpenShift with GPUs, focusing on features like MIG (Multi-Instance GPU), time slicing, MPS (Multi-Process Service), and vGPU (Virtual GPU). Practical examples are included to make these concepts approachable and actionable. 1. Why GPUs for AI Workloads? GPUs are ideal for AI workloads due to their massive parallelism and ability to perform complex computations faster than CPUs. However, these resources are expensive, so efficient utilization is crucial. Modern GPUs like NVIDIA H100/H200 come with features like: MIG (Multi-Instance GPU): Partitioning a single GPU into smaller instances. Time slicing: Efficiently sharing GPU res...